

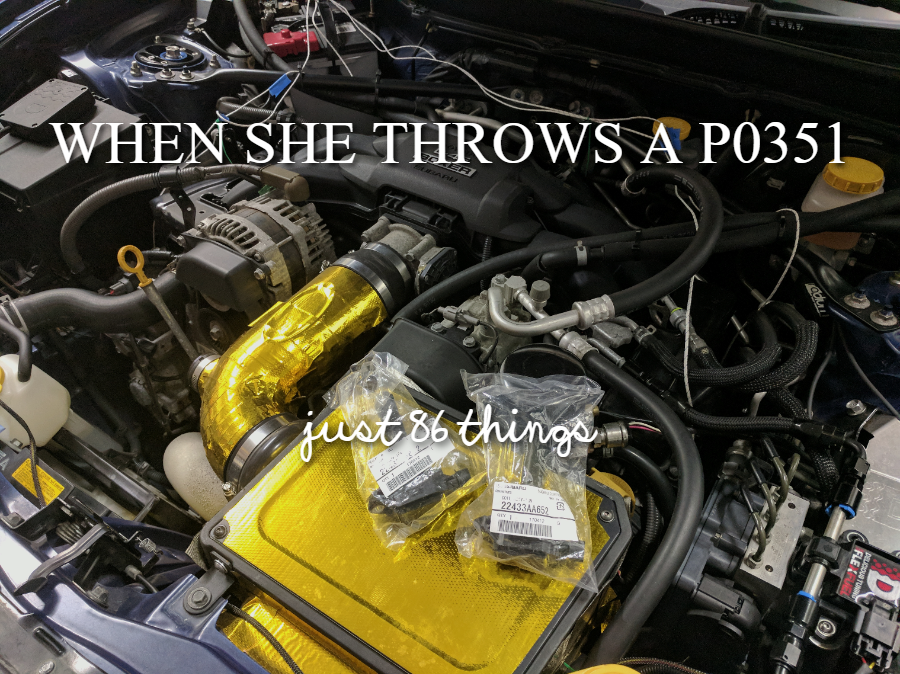
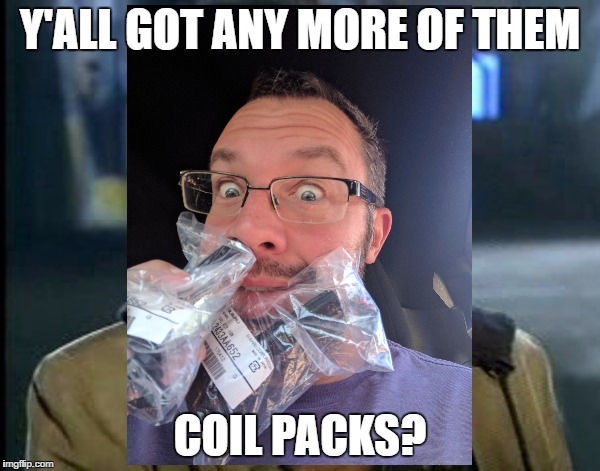
Hitting a P0351 or P0353 Check Engine Light (CEL) is just a rite of passage in your 2013 or 2014 BRZ / FRS / 86 – it’s simply just going to happen, particularly if you drive the car hard and if you track it. 2015+ did undergo some changes, although I’m not sure how helpful they are, as everyone I know seems to be rolling out in 13/14 MY. You should just get used to these parts failing and it being a part of your 86 life if you track one of these cars. I welcome any comments and experience from anyone with a 2015+ that has had a different experience than my own! What follows are my friends and my experience with 2013-2014 MY cars.
How To Prevent Delay The P0351 CEL Failure
Most of the time you see this code, you’re going to be a track guy on the track, although certainly people hit it on the street. Can you keep tracking? Yes, people report varying problems but generally finish their day on it; should you ignore it? Not really – it’s going to keep popping up. If it also means (maybe?) you’re dumping some unspent fuel into your exhaust, that’s no good, especially if it’s dumping any on a cat.
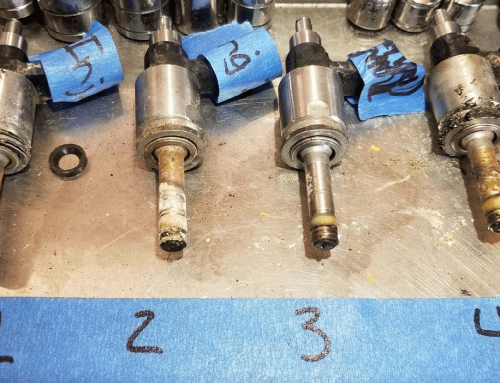
The P035X code indicates which cylinder is having the problem with the final X. Cylinders 1 and 3 run along the passenger side of the car where the header goes, and burn out much more frequently than the driver side – however all coils will potentially fail at some point; the header side just does it twice as often. The likely correct speculation is that this is due to additional heat on this side of the car as a result of the header.
Is it possibly to truly prevent failure of the coils? My guess leans towards no, but having better heat management should extend their lives. What has been tried and what can we do to try and manage our heat better?
- Gold foil tape – we can try the McLaren mod, although I can’t be clear on if this is helping or harming. It would seem to help if the primary source of additional heat was external, but if the primary source of heat is the engine, perhaps the tape actually restricts the flow of heat out of the coil packs and into the air around it? If that is the case, rather than adding tape, we would seem to be better off just getting rid of the saturated hot air. (I have used tape on my coils for some time myself.)
- Header / cats / wrap / ceramic – I’m not sure how much the header itself is contributing to overall heat in the engine bay. After poking around on the internet, I believe it is actually a myth that a ceramic coated header will reduce underhood temperatures, all other things equal. What about having cats or not though? These also factor in to EGTs and is there a relationship between an EGT and underhood temp?

I don’t have engine bay temps, but clearly the catted systems are running warmer. It would not be surprising if this lead to greater underhood temps. Ceramic coating will probably not reduce them, although running catless may very well.
- Hood vents – these most certainly do reduce engine bay temperatures; allowing us to get rid of some of the heat saturated air should mean the air can absorb more heat from the coil packs. Verus Enginering (formerly Velox) has some available, with optional rain guards. I park outside and live in IL so I went with these. Another option is trackspec, who I think have more generically available ones, with an install that cuts through some more of the hood frame supports (rather than Verus working between them) and has no rain guards. Verus provided some data with temperatures measured in the engine bay, including the air around the coil packs. Looks like it dropped the passenger side below the driver side with no louvers.
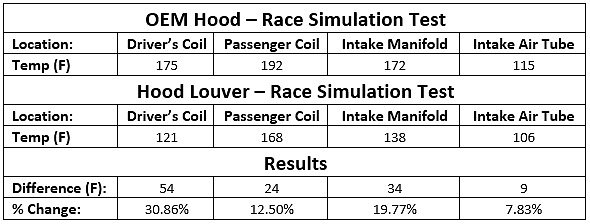
86 / FRS / BRZ Hood Vent Testing
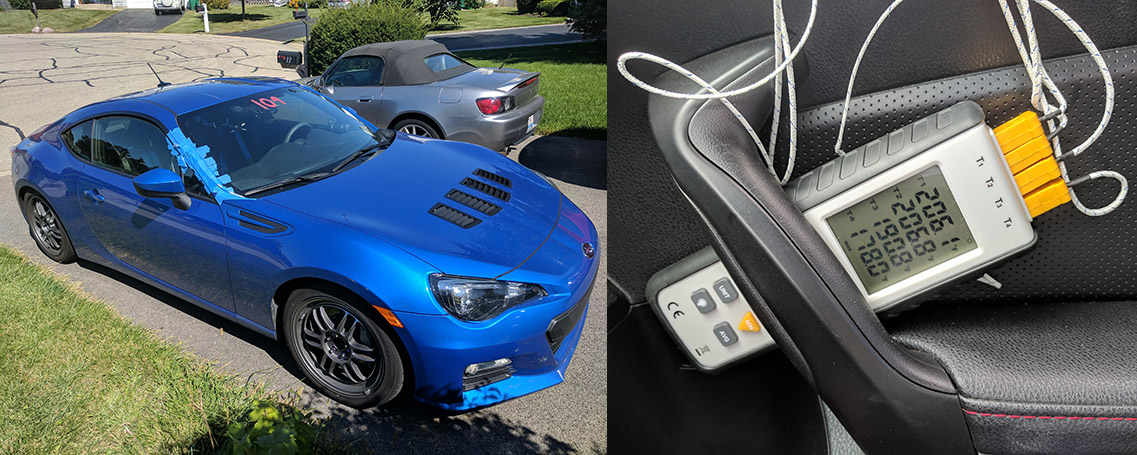
I bought a thermocouple thermometer and used some gold foil to attach a probe to each coil pack as seen in the engine bay pic above. The test without louvers was at a track day on a similar day at a similar time of year last year. It’s not apples/apples but hey, this is the best you’re going to get.
I’m going to call my data rather dirty, and say I observed roughly the following reduction per coil:
| 1 | 2 | 3 | 4 |
| -5.5% | +0.9% | -9.8% | -2% |
I doubt very much coil #2 actually got hotter as a result of vents – so FWIW these numbers are pretty rough, but it’s all I have for now. Hopefully I’ll see a much longer life on the coils I begin replacing. I did just trigger one and am about to replace #3 on September 10th, 2017.
How To Fix The 86 FRS BRZ P0351 CEL P0353 etc
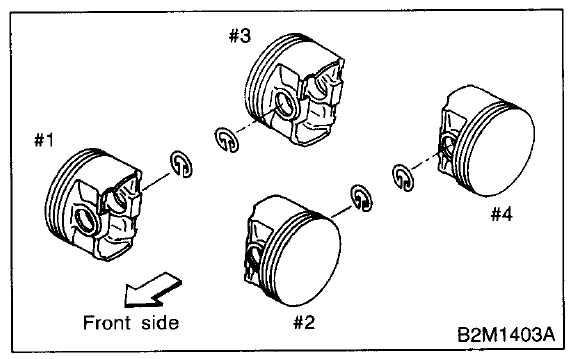
Subaru Part# 22433AA652 is what you are looking for on a 2013-2014 car. The cylinder count standing in front of the car and looking towards it goes from 1 on the front left, to 2 on the front right, 3 back left then 4 back right. 1 is front of the car passenger side, 4 is closest to the driver. One can loosen the motor mounts and jack up the engine to make the replacement job easier, or depending on the size of your hand and your ability to fiddle around with shit you can’t see very well, you can just work with it as is within the confines of the space you have available. The frame tapers in and makes for less space on cylinders 3 and 4 but the job is doable without jacking the motor up.
You need to remove the stuff up top – which is going to be the harness on the passenger side, then the big black metal bracket, to access the coils. The passenger side doesn’t have the harness to remove but it does have a bunch of hard lines that get in your way. I remove the brace that goes to the center of the car when doing this side as well.
It’s worth cramming a shirt or something down below the coils between the engine and the frame so no worries if you drop any tools or screws. You’ll also want to let the car sit a while so that the engine is cool, it’s harder to do some of the more delicate removal tasks with gloves. Once you undo the small bolt holding in the pack, any I’ve encountered thankfully unscrew pretty freely – if not I think this job would be a lot harder. You can unscrew and remove it with the tips of your fingers and pull it out. The actual coil pack should pretty easily pop out after this. It can be a bit of a pain maneuvering in there to undo the little wiring harness. Given the little amount of space available if you didn’t jack the engine up, you’ll have to twist and bend the coil pack and stem to get it out, which is ok.
Pop the cover off the new pack and you’ll see some dielectric grease in there. It’s ready to go and to just reverse the whole procedure now. Once you plop it back in and hook the harness up, start threading the bolt in by hand, it should go pretty smoothly. At the end you’ll be using a tool and probably making very small headway with it given how much of a pain it is to get in there, but keep going until it feels firm and you’re done, no reason to torque anything down crazy on these packs. Now you’re done until you blow the next one!
UPDATE: Subaru TSB # 07-120-17 calls for a replacement of the wiring harness and the coil packs with 2015 ones. It looks like parts and labor will be over $1000 – and I just missed my warranty period by a couple of months. Subaru of America may provide this fix out of warranty as a good will gesture – however they will only do this once, and I used up my one incident getting SoA to make right an incident where Liberty Auto City Subaru did me real dirty.
TSB Replacement Parts
| HARNESS-ENGINE | 24020AG080 |
| COIL ASSEMBLY-IGNITION | 22433AA730 |

Has there been any research on okada coil packs and their durability.
so there was a guy on ft86club that got them but iirc still threw a code later? around same price for 4 okadas as it is for 4 2015 coils and harness, may as well just get that stuff which actually fixes the problem.