
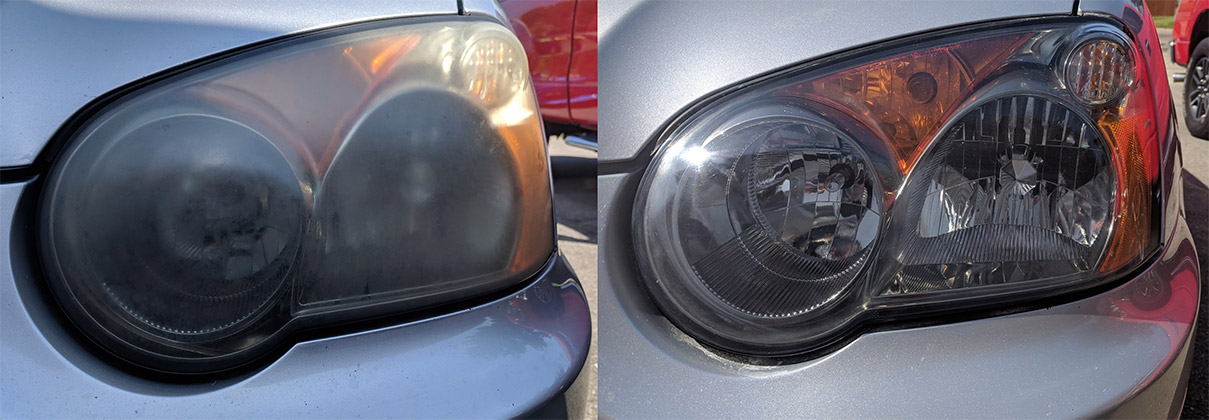
I have a 2004 WRX with some yellowing headlights, and decided to try a 3M headlight restoration kit on them. I was optimistic how things would turn out, even though I’m really not quite that great with my hands, working on anything. I’m pretty poor and taking care of the looks of the car, and have never really polished or buffed anything, but hey – these lights were looking pretty bad, and I thought I’d give this a go. After some research, I ended up deciding that the 3M headlight restoration kit was the way to go; it looked to provide adequate, if not more than required, supplies; it also had better reviews than some of the other and cheaper kits out there. To be clear: I’m no pro at this stuff, so if I could do this, you most certainly can too. All you really need is a drill. Or in my case, all I really needed was my brother’s drill. I would budget a good 1-2 hours for this project.
I’ve got a video I chopped together below including the process. Overall it was pretty simple.
- Clean the headlights with soap and water.
- Mask off the headlights with a couple layers of tape to avoid doing damage to your paint.
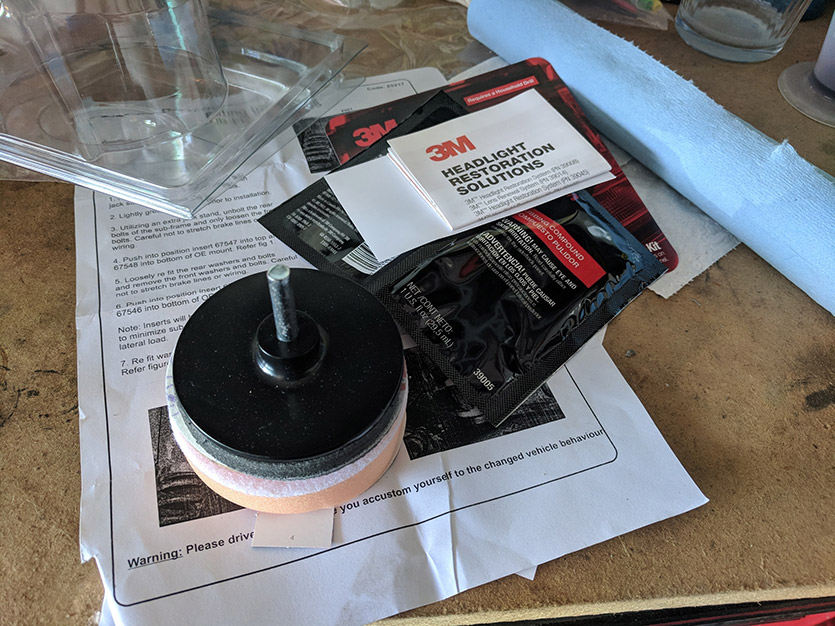
- Sand the headlights with the 300 grit discs – there are 6 available. I used all of them. The curves were way trickier to do with the drill so I tried to get them by hand as well.
- Switch to the 800 grit sandpaper discs to smooth out the lights and remove the old crappy plastic. I used all (4) again.
- Use the (1) 3000 grit refining disc. I liked this step more than the others, as it had some thickness to it and it could fit the form and curves of the headlights much better. You spray the lights down with water for this step as well. I’m not sure if there is any overdoing any of these steps, so I kept going over on each until I was satisfied they were thoroughly complete.
- Last buffing step is to apply some rubbing compound and use the compound on it. After this things should be looking pretty good.
- Not included in my kit was an advised wax protectant to finish the job and help protect the headlights you just restored; I used some kind of nano-wax my brother happened to have in the garage.
Overall I’m happy with the results, and think the headlights are looking great now; it looks a lot better than it did before. It now has a fresh and clean look to it. The kit is inexpensive and I think the results were well worth the time and effort put into applying it, which came out well for an amateur like me as well.

Leave A Comment